So, how do you heat your small greenhouse in the winter without breaking the bank, or the environment? I’ve got some cost-effective and eco-friendly ways we can turn your frigid greenhouse into a tropical paradise for your plants. Let’s take a look…
1. Mother Nature’s Gift: Passive Solar Heating
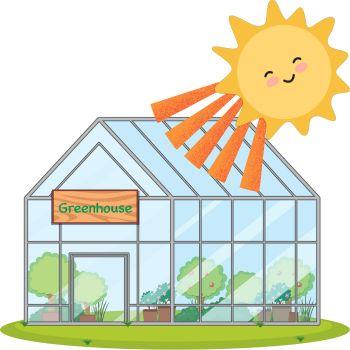
Harness the power of the sun with double-glazed windows or greenhouse film. It’s free, folks! Just make sure your greenhouse is well-insulated.
- Double-Glazed Windows
- Replace those flimsy, single-pane windows with double-glazed ones (or “twin wall” like this greenhouse). Two layers mean better insulation. Keep the cold out and the warmth in.
- Greenhouse Film
- Get yourself some greenhouse film, not for Hollywood, but for your plants. Cover your greenhouse walls with this UV-treated magic. It traps heat like a champ.
Note: Seal any gaps or cracks like a pro. Weatherstripping and caulk are your friends. Your greenhouse should be airtight, not drafty. You can also use thermal curtains or blankets to keep the warmth locked in.
- Thermal Mass – Store That Heat
- Add thermal mass like barrels of water or stone. They soak up daytime heat and release it at night. Plants love this steady warmth.
- Ventilate Wisely – No Saunas Here
- Ventilation is key! Ensure you have proper vents to release excess heat during the day. Don’t turn your greenhouse into a sauna.

Note: Invest in a cheap thermometer/thermostat. Keep an eye on the temperature. Adjust openings and coverings accordingly. Just remember, even passive solar heating requires a bit of active attention.
2. Bubble Wrap Insulation
Cover your greenhouse walls with bubble wrap. No, it’s not just for popping! This affordable insulator keeps the heat in and the cold out.
3. Heat Mats for Happy Roots
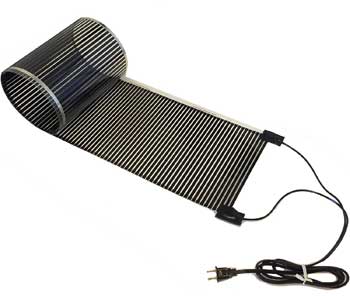
Pamper your plants’ roots with heat mats. They’re like heated blankets for your green babies. Energy-efficient and targeted warmth.
First of all, place heat mats strategically under seedlings or potted plants. Also, I suggest investing in mats with adjustable thermostats. Your roots want comfort, not to be cooked.
Next, cover the mats with a layer of insulation like bubble wrap or foam board. Keep the heat where it belongs. Check soil temperature regularly. Adjust the mat settings as your green buddies demand.
Heat mats provide a great option for small lean-to greenhouses that already have insulation on one side, due to their strategic design.
Note: Use timers to give your roots a break. They need some cool-down time, too.
4. Electric Space Heaters
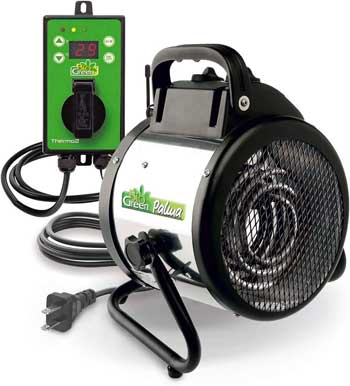
Using electric space heaters in your greenhouse can be a hot mess or a smart move, depending on how you handle it. You can choose from a variety of different models, which can save you money – or cost you extra in your utility bills. Here are some tips:
Heater Placement – Position heaters strategically to avoid plant scorching. They crave warmth, not a tan. In addition, you want to set up fans to circulate warm air evenly. In other words, prevent hot spots and cold corners.
Energy-Efficient Models – Invest in energy-efficient heaters. They’ll keep your plants cozy without torching your wallet. Plus, get heaters with thermostats. They shut off when it’s warm enough. No need to roast plants unnecessarily.
Insulation – Insulate your greenhouse. It’s like giving your heaters a cozy sweater. Less heat loss, more savings. Polycarbonate greenhouses insulate better than pop-up greenhouses, for example.
Multiple Small Heaters – Opt for multiple smaller heaters instead of one big powerhouse. Efficient heating zones save you money.
Note: Keep heaters clean, and don’t Ignore the dust bunnies. Dust and grime reduce efficiency. A clean heater is a happy heater.
5. Oil-Filled Radiators
A bit pricier but efficient – they’re like the luxury cars of greenhouse heaters. Warmth without the noise.
Benefits of Using an Oil-Filled Radiator:

- Efficient Heating – Oil-filled radiators are like the James Bond of heaters – smooth, efficient, and virtually silent. They warm up your greenhouse without a fuss.
- Steady Warmth – These radiators maintain a stable temperature, sparing your delicate plants from abrupt climate changes. Your greenhouse becomes a sanctuary of warmth and consistency.
- Energy Efficiency – Unlike some energy-guzzlers, oil-filled radiators are more energy-efficient. They provide warmth without the guilt of contributing to a soaring electricity bill.
- No Fan, No Noise – Radiators don’t need noisy fans to spread warmth. You won’t hear a peep, allowing you to enjoy the soothing sounds of nature.
- Safe and Sturdy – Safety is paramount with these heaters. They’re less likely to cause fires or accidents. Their solid construction and automatic shut-off features ensure peace of mind.
Drawbacks of Using an Oil-Filled Radiator:
- Slow Warm-Up – Oil-filled radiators are not sprinters; they’re marathon runners. Expect a slower warm-up time compared to other heating options.
- Higher Initial Cost – While they’re kind to your energy bill, oil-filled radiators can be a bit heavy on the wallet upfront. It’s an investment, but a refined one.
- Heavy and Bulky – Moving these radiators is akin to repositioning a sarcophagus. They’re not exactly portable, so choose your greenhouse’s heating spot wisely.
- Limited Coverage – Radiators are ideal for smaller to medium-sized greenhouses. For larger spaces, you might need multiple units, which can be a hassle and costlier.
- More Maintenance – Occasionally, you’ll need to maintain your radiator by cleaning it and checking for leaks. It’s like pampering your favorite vintage car – a labor of love.
6. Propane or Natural Gas Heaters
These babies pack a punch but can be costly to run. Use them sparingly and ensure proper ventilation for safety.
The Pros:
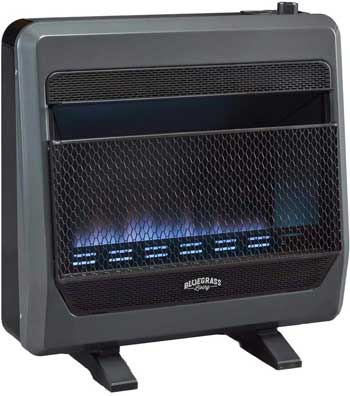
- Raw Power – Propane and gas heaters are the muscle cars of greenhouse heating. They can generate a lot of heat quickly, perfect for taming winter’s chill.
- Cost-Effective – When it comes to the cost of fuel, propane and gas often beat electricity hands down. Your wallet will breathe a sigh of relief.
- Reliable – These heaters are like the old faithful campfire – once they’re lit, they keep burning. No need to worry about power outages ruining your greenhouse’s cozy atmosphere.
- Great for Large Spaces – If you have a substantial greenhouse, propane and gas heaters can handle the job with ease. They spread warmth far and wide, like a cozy hug.
- Temperature Control – Many models come with thermostats, allowing you to set your desired temperature and let the heater do the rest. Greenhouse comfort at your fingertips.
The Cons:
- Ventilation Nightmare – Burning propane or gas produces carbon dioxide and water vapor. Proper ventilation is crucial to prevent suffocating your plants. It’s like juggling fire and air, quite the balancing act.
- Safety Concerns – These heaters are not to be taken lightly. They can be fire hazards if not maintained and operated correctly. Safety precautions are a must.
- Frequent Refueling – Propane and gas heaters require a constant supply of fuel. Be prepared for the chore of refilling tanks or connecting to a gas line.
- Not an Easy Installation – Installing gas heaters is no weekend DIY project. It demands expertise and, often, the involvement of a professional. Expect installation costs.
- Environmental Impact – Burning fossil fuels isn’t exactly eco-friendly. Your greenhouse may have a cozy vibe, but you’ll have to live with a guilt-ridden carbon footprint.
7. Geothermal Heat Pump: Going Big
If you’re feeling extravagant, install a geothermal heat pump. It’s eco-friendly but requires a hefty upfront investment. Let’s compare the good and the downsides:
Advantages of a Geothermal Heat Pump:
- Energy Efficiency – Geothermal heat pumps are the eco-conscious gardener’s best friend. They tap into the Earth’s stable temperatures, offering remarkable energy efficiency. Mother Earth would applaud.
- Consistent Heating – These pumps provide a stable and constant heat source. No wild temperature swings here. Your plants will feel like they’re on vacation in the Bahamas.
- Low Operating Costs – Once you’ve made the sizable initial investment, your wallet can breathe easy. Geothermal systems are known for their low operating costs, saving you a bundle in the long run.
- Quiet Operation – Geothermal heat pumps run with the grace of a ninja. Say goodbye to the clunky hum of conventional heaters. Your greenhouse will be a peaceful oasis.
- Long Lifespan – These systems have remarkable durability, often outlasting other heating options. It’s an investment that promises returns for many seasons to come.
Disadvantages of a Geothermal Heat Pump:
- High Upfront Costs – Brace yourself for a hefty upfront investment. Geothermal systems don’t come cheap, and your wallet may need some therapy afterward.
- Complex Installation – Installation is a job for the experts. Forget about your DIY ambitions; you’ll need professionals with specialized knowledge to get this baby up and running.
- Land Requirements – These systems require ample space for ground loops or wells. If your backyard resembles a postage stamp, you might have a problem.
- Climate Considerations – Geothermal pumps work beautifully in most climates, but they do rely on consistent ground temperatures. In extreme cold, supplementary heating may be necessary.
- Environmental Impact – The installation process involves digging up your yard. While this is temporary, it’s not exactly a “green” aspect of going green.
8. Heat Recovery Ventilators (HRVs)
Now, this is high-tech. HRVs recycle heat from exhaust air. Great for energy efficiency but not for the faint of heart (or wallet). Here are the pros and cons:
Advantages:
- Energy Efficiency – HRVs are eco-friendly champs. They recycle heat from outgoing air, minimizing energy waste. Mother Nature would give a nod of approval.
- Steady Temperature – They maintain a consistent temperature. Your plants won’t go from sauna to Siberia in a matter of hours.
- Improved Air Quality – HRVs exchange stale air with fresh, oxygen-rich goodness. Your plants and lungs will thank you.
- Humidity Control – They help control humidity levels, reducing the risk of mold and mildew. No more fuzzy surprises on your leaves.
- Quiet Operation – HRVs run quietly, so you can have a serene greenhouse experience without the hum of industrial fans.
Disadvantages:
- Costly Investment – HRVs come with a hefty price tag upfront. Prepare to shell out some green to save green.
- Complex Installation – Installation isn’t a walk in the park. You might need a pro to set it up. Say goodbye to your weekend plans.
- Higher Maintenance – They require regular maintenance. Filters need cleaning, and parts can wear out. Get ready to get your hands dirty.
- Climate Dependency – HRVs work best in sunny climates. In the dead of winter, when the sun is MIA, they may struggle to do their heat-recycling magic.
- Not for Tiny Greenhouses – For small greenhouses, HRVs might be overkill. They’re more suited for larger setups.
Remember, the key to a warm and cost-effective greenhouse in winter is insulation and controlled heating. Mix and match these solutions to suit your needs and budget. Happy gardening year-round!